After going ahead with the purchase of my first marine tank, a secondhand AquaOne MiniReef 120L, I set it up outside and successfully tested to ensure there weren’t any leaks. After 24 hours of running it in I emptied it out and gave it a thorough clean before moving it to its permanent home inside.
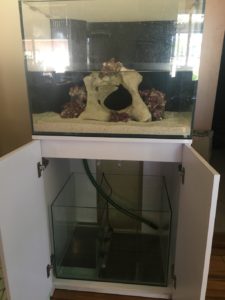
Tank half-filled before I thought to test the weir and discovered the leaky inlet connection
First up was procuring some needed basics so there was a trip to Bunnings to grab some decent quality buckets (3) and 25L water containers (6). Also a trip to an aquarium shop to pickup some bits and pieces including: marine test kit, thermometer, siphon tube and refractometer. Next were essentials for the aquascaping including coral sand for substrate and dry reef rock. My first attempt at aquascaping also including some misguided advice and a large piece of holy rock (see my second attempt at aquascaping here).
Tank was setup. Holy rock to be used as a base containing an arch placed in middle, with dry reef rock around it. Then I added a layer of about 2-3cm of coral sand then carefully started filling the tank. Then I heard it… drip-drip-drip. That can’t be good. After some inspection I saw some drips were coming through the weir on the inlet connection. At first I almost ignored it but then in a power outage scenario where return pump loses power this could lead to entire volume of weir draining into the sump. Plus at such an early stage in tank setup it would be better to fix these problems properly from the beginning before the tank is established.
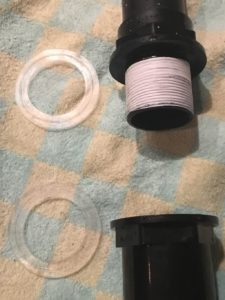
Inlet pipe threaded connection with washers
I am not an experienced plumber but initially just dried some basics. Drained the weir, disconnected the plumbing, cleaned all the connection points (including checking the silicon rings carefully for any damage or debris which could be breaking the seal) and reassembled everything. Drip-drip-drip. Double checking the manual I see a note that mentions plumbers tape should be re-applied to the thread every time the plumbing is redone. So the next day I do another Bunnings run for some tape, cleaned everything off, carefully putting in place the tape and re-try but still the dripping!
After some online research some people are saying use glass sealant / silicone to help seal the connection whilst others say this shouldn’t be needed. Anyway since the only other thing I could think to try was to purchase replacement plumbing parts, I thought I’d try the glass sealant. So another day and trip to get the sealant. I carefully dried and cleaned off everything and planned it out so I could assembly things reasonably quickly before the sealant started to dry. My first attempt was a disaster, it seems the silicone makes the washers ‘slippery’ and I accidentally overtightened causing the washers to stretch / pop out of place. D’oh! So another disassemble, clean and dry and attempt – this time I was very careful not to over-tighten and hopefully do the needed ‘hand tighten’ amount. After a tortuous 24 hour wait to allow it a good chance to cure, I again filled the weir with water and listened intently for any dripping. Finally success!
My plumbing adventures had set me back a few days but I certainly had a much better understanding (and appreciation) of how the plumbing works.
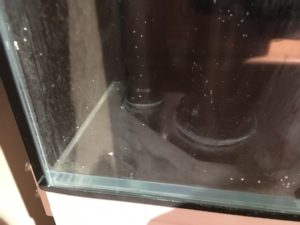
Base of weir showing upper part of inlet plumbing connection
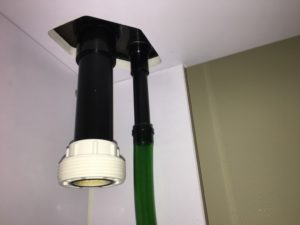
Underneath weir showing lower part of inlet plumbing which drains into the sump